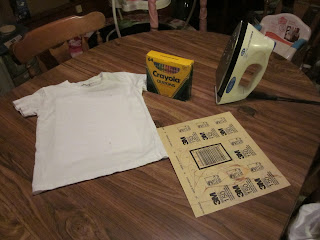
I woke up this morning hell bent on making party hats with the girls. I didn't know if it was going to take the form of princess crowns, or big cone shaped party hats with ribbon coming out of the top. But I was convinced I was making party hats for them. Then, I came across this board on Pinterest and my entire YEAR changed course. I think I was looking for something for my dad and stumbled upon, http://pinterest.com/joycelibal/kid-crafts/ and OMG the IDEAS!!!! Well, one of the ideas was to use SANDPAPER and crayons to make Iron on transfers. How fricking cute?????
So, I ask Mike if we have any sandpaper I could "destroy" and head downstairs to get sandpaper and my iron, which I had packed away MONTHS ago in hopes that we would be in a new house by now, and 2 white play shirts the girls have. I grab the crayons and we set to work.
Supply list- easiest one yet, i think!
White t-shirt(s)
Sandpaper- fine-ish grit. I used 150... any thicker and it EATS your crayons
Crayons
Iron
I put a piece of white paper between the layers of the shirt, just in case something were to bleed, or stick, or something, I don't know if it is possible, but since these are once and done things, I decided to use an abundance of caution.
I took a little sandpaper and wrote "I'm 4" on it and made a cake and balloons to go on the back of Iris' shirt. Word to the wise, remember that you have to write BACKWARD on the sandpaper if you want it to come out right on the shirt :-p I didn't write backward on my "test" cloth, and now I have a cheese cloth that says "sgitsuL ehT" Oh well, at least it was on a cheese cloth and not Iris' shirt!
Penny wasn't really feeling it too much, she wanted to color on the back of the sandpaper, which probably didn't make my iron too happy tonight. So I colored most of her sandpaper, and to be honest, I was REALLY happy with the way it turned out! But, Iris did well with hers, and she colored quite a bit before finally becoming board, so I wrote "Birthday Girl" (not so easy when you are trying to mirror image every letter!) and ironed it on to her shirt.
Once everything is colored, and the more color the better, don't be afraid to press hard, flip the sand paper over and iron! I set my iron to medium, and it only takes a few seconds for the image to transfer. The shirts look SOOO much better than the ink jet iron-on templates you get at the craft stores, and these are so much more personalized.
I honestly cannot WAIT until Saturday at the Children's Museum to see the girls wear these. Now my real question is, how well will they wash??? I guess we will find that out sometime next week!


No comments:
Post a Comment