Monday, April 29, 2013

Day 119: Coffee Filter Fish part 1

Well, we are revisiting the coffee filters.  I found a ton of crafts I wanted to try with them yesterday, so here we are, making coffee filter fish!

I gave the girls coffee filters and markers and told them to have fun.  The colored quite a bit, lots of scribbles, lots of colored hands :-p  I made spirals and stripes, just to see what happened when I spritzed it with water. .. Water, that is where part 1 of 2 comes in.

It was such a beautiful evening today, that we took the girls to the park to fly their planes, and for Mike to fly his RC plane.  But, that brought us home late, so Mike bathed Coraline while I did craft with Iris and Penny. At the very end, I filled the water bottle up and spritzed mine with water, I failed to account for the fact that my water bottle is an industrial sized thing that sprays about an oz of water per squeeze (ok, maybe i'm exaggerating a bit, but it definitely doesn't "mist" it downpours on things :-p) Well, when it was already 8 p.m. and I doused my filter in water, and the girls both wanted theirs sprayed too, I knew then that I would not be able to put the fish together with them tonight.  It was just going to have to wait, because our coffee filters could have been rung out!


Once bath was over, I finished making one of my fish just to have a pattern for the girls to see tomorrow, so here is what you will see tomorrow, hopefully x 2 or 3 hehe.


Sunday, April 28, 2013

Days 117/118

Well, I slacked again, but only because I was out of town for Penny's birthday and didn't bring my laptop with me.  However, thanks to a savvy aunt, we didn't miss craft yesterday!

Day 117:
My aunt works for a pediatrician's office and is in charge of ordering the stickers.  The girls really luck out in this department, because she has a wealth of stickers for them every time we visit!  However, yesterday, she came up with the idea of giving the kids these "build it yourself" stickers.  They are a really cool idea that I had never seen until a few months ago, at her office, and they come in tons of different themes with one main focal point, and then a bunch of little extra pieces to add to the pictures.  Some that she had at her house were birthday cupcakes, shopping carts, princess carriages, cranes, people, teddy bears, fish tanks, and I am sure quite a few more even.  She even had a great idea to put them on wax paper so the kids could move them around as they saw fit... I will need to remember that trick for the next stickering session we have at our house!


Day 118:
Well, I came *this* close to forgetting completely about craft today!  You would think after 118 days, it would be totally ingrained in my head, but it is not apparently :/  So, we stopped at a BP station to fill up on the way back home and I ran in with the express purpose of trying to find something in a convenient store to do craft with.  I had crayons in the car, so i was hopping beyond hope that they would have paper plates... they didn't.  They had styrofoam and plastic, no paper :(  But, they had white, circular coffee filters.  I figured that these would make very cute flowers if colored nicely, so I grabbed them and headed back to the van.
I handed both girls back coffee filters, gathered up as many crayons as i could find that had been strewn through he van, and cut them loose.  After almost 2 hours, this is what we ended up with... 1 usable, very pretty, flower! lol

P.S.- here are the finished Doc McStuffin's Big Books of Boo-Boos


Friday, April 26, 2013

Days 115/116

Sorry for the combined post with NO pictures!  Yesterday was one of the longest nights i can remember having!  I ended up driving around for over 3 hours to find a booster seat for Penny for her birthday.  I was so tired by the time I got home at 9:55, that I just didn't have it in me to blog!... the lack of pictures will be explained soon enough!

Lets start with Day 116:

Remember those beads I made last week?  The ones out of the crayola model magic?  Well, they turned out perfectly, so we made bracelets yesterday.  I let the kids use buttons, and beads, and the homemade beads. They sat at the table so nicely, stringing beads onto their craft thread, and they both turned out very nicely.

Iris was so proud of hers, that she wanted to take it to school today to show her teacher.  I allowed her to take it into the van, but made her leave it there, so that it wouldn't get lost.  Well, Penny found it and tore all the homemade beads into little shreds before I realized it.  I was so sad for Iris.  I cleaned up all the traces, and I hope that she just forgets about it, because I know that she will be upset if she finds out Penny broke it. :(

Day 117:

Today, you aren't getting pictures because Iris went CRAZY with glitter glue and every time i touch her craft, i get glitter glue all over me.  So I am going to let it dry first.. like maybe next week :-p

We made Doc McStuffins, Big Books of Boo-Boos today for craft.  It was a lot of fun.  They are REALLY into Doc McStuffins right now, and I've caught them both "writing" in their "big book of boo-boos" and I saw them at Toys R Us today for $7.  I thought that was a little ridiculously, so we came home and made our own.

We used foam for the front and back covers (about 6"x6"), and construction paper cut to the same size, for the pages.  I used a hole punch to poke holes in the covers and the pages so that once they are done, I can string them together and the kids can have a working book.

I put the "Big Book Of Boo-Boos" letters on the back, but they each got to pick their own inside paper color, as well as decorate the front cover.  Again, Iris went OVERBOARD on the glitter glue, i don't know if it will EVER dry at this point :/  Hopefully, pictures will be added to this one before too long!

Wednesday, April 24, 2013

Day 114: Cookies!

Today, I decided that it was time to venture into the world of cookie crafts.  I have this old Cookies For Kids cookbook that I have used since I was little, and I knew that there was a recipe for these really cute, very bright, make your own cookies.  Well, we tried that recipe, and it was AWFUL!  It was a disgusting, sticky mess, and I just couldn't imagine trying to have the kids work with it, so we went with a recipe for SPELL-it- Cookies.  They are just a very simple sugar cookie recipe that you roll into thin snakes and make letters with.  I ended up combining the basics of both recipes to make colored sugar cookies.

I was really impressed that the girls really ended up enjoying making cookies so much.  Iris made spirals, she made a LOT of mashed circles.  Penny enjoyed making semi snakes.. she was so proud of herself.  I didn't have the heart to redo many of their cookies, but the ones that were just too thin from them smashing them too much, i ended up making 2 layer cookies out of :-p

I added the smiley face pieces, the caterpillar pieces, the braids, and I made the letters for us, but other than that, the girls did it all themselves... and they even taste good!


Tuesday, April 23, 2013

Day 113: Crafting After Dark

Ok, so 7:00 isn't really AFTER dark, but it is a solid 45 minutes after the girls' normal bedtime.  But, tonight was a special night, and it was just us girls home, so I made it a special craft.  To celebrate/commemorate (?) the meteor showers last night and tonight, we made our own constellations!

I came up with this idea because the girls have been FASCINATED with my telescope that we just found buried in the basement, and I decided that it would be cool to let them see stars, since they are always in bed before dark.  I laid out a big piece of polyester batting on the dining room table and gave the girls each a piece of construction paper.  I put an assortment of double pointed knitting needles on the table for them, and told them to poke holes in the paper with the needles.

We spent probably 15 or 20 minutes poking holes in the paper.  I wrote each one of their names and made shapes (even the big dipper!) on my piece of paper.  When we were done, we took our construction paper up to our closet (again, the only place in our house that doesn't have windows lol) and grabbed Mike's MagLite.  I turned off the lights, shut the door, and put the paper over the flashlight.  Instant constellations on the ceiling of our closet.  We spent some time finding the different shapes, their names, moving the paper up and down, back and forth, just to see what changed on the ceiling.  Then we put each of their pictures over the flashlight.  Of course, we couldn't do a craft about stars without singing Twinkle Twinkle Little Star.  Honestly, I think it was probably one of the more special crafts, at least for me, that we have done to date.

I am sure there is a camera out there that could have taken a picture of the "stars" on our ceiling without totally washing everything out, but my camera is not one of them, so you will just have to use your imaginations to think of what our constellations looked like on our closet ceiling :)

Monday, April 22, 2013

Day 112: Homemade Bath Paints


A 70* day after a bitterly cold weekend, we'll take it!  That also means that we were outside for over 4 hours today, so I am exhausted.  I don't think the kids were that tired, but are kids ever???  I came across a homemade bath paints idea a few months ago, and I thought "that would be fun to try" but bath is usually too late, the kids are too tired, and I'm too frazzled to think, so I've put it on the back burner.. until now.

Tonight, I looked up the bath paint "recipe" online and came across a few different ones.  The most common is to use clear/unscented baby body wash, cornstarch, and food color.  Another blog i found said baby body wash, corn starch and kool-aid.  A third blog said to use shaving cream and food coloring.  Now, I must admit, I was scared about the food coloring and shaving cream idea after the marbled eggs left my hands rainbow colored for three days last month.  But, I still had shaving cream, so I combined two ideas.  Shaving cream and kool-aid.  I did do 1 cup with 1 drop of blue food coloring, and it was the prettiest of the colors.  But, the kool-aid smelled delicious while they were playing :-p

The girls loved the bath paint.  The water was purple by the time they were done, they did more smear it on and erase it than they did painting, but Penny was truly disappointed when we said that paint time was over with.  All things considered, I'd call this a success!


Sunday, April 21, 2013

Day 111: Nature Rubbings

I remember in 3rd grade, we did a local history unit and went to the Old Worthington Cemetery and did gravestone rubbings with crayons.  It was a little creepy to me, even at 9 years old, that we were making impressions of tombstones in crayons.... but, it was a fun activity.  A few days ago, when we were outside coloring the driveway, I thought about how fun it would be to go outside and make rubbings of different objects with crayons.  Well, today, I thought it was warmer than it really was and the kids really wanted to go out, so I threw so coats on us and we went outside with paper and crayons.

First, it was sunny, and the wind was calm, so we started at the driveway and used our crayons to make an impression on the paper, then we went to the neighbors fence (hope she doesn't mind that it is a little browner now than before we started this project :-p), then went to the brick below our porch, then the house, then the neighbors tree since it is the only tree around us now!

Iris really got into it, she had a lot of fun and got the point.  I wanted to use some stepping stones, and kind of a take a walk and find more things to make impressions with, but Penny started to complain that she was cold, the wind was ripping, and Coraline's feet were just about frozen, and I was cold.... so, we came inside.  Here is what we ended up with:

Saturday, April 20, 2013

Day 110: Mt. Dew Camp Lantern

So, who saw the picture go around Facebook a few months ago about making a glow lantern out of 1/4 bottle of Mt. Dew, a "tiny" bit of baking soda, and 3 cap fulls of peroxide?  Well, I just HAD to try it, i mean, come on, if it worked, it would be awesome, would never drink Mt. Dew again, but could be a lot of fun!  And if it didn't work, well, we had a failed science experiment.

Mike and the girls made Mt. Dew glow lanterns today for craft time after we got home from Lodi.  Well, guess what, it failed, and Snopes.com busted it too. They did not glow at ALL.  But, Mike was not to be deterred.  He was going to make those lanterns "glow" one way or another.  First, they put flashing LED lights in the bottles and ran up to our closet in our room to see them "flash" and "glow."  Then they came back down and found glow sticks that the girls got for Christmas and decided to break them and stick them in the lanterns.  Personally, I thought that they should have broken them open and poured the contents into the soda bottles, but mike thought that they would be too diluted.  But, they glowed, see?


After the kids went to bed, we decided to mix the blue and red glow sticks and see what happened if we added it to water.  So, we broke them (and in the process discovered that the thing you break to get glowsticks to glow is actually glass!) and poured the glow stuff into a bottle of water, shook it up, and ran up the steps.  We had the PRETTIEST purple glowing water for about 2 minutes until it totally died and no longer glowed.  But, I will still take a moment to say: I was right and you were wrong :-p


Friday, April 19, 2013

Day 109: What a day!

Well, let me digress before I even begin.  I have been sitting, GLUED to the computer for the last two hours, afraid to blink because Watertown has been on the brink of closure.  I am so thankful to see that this ordeal can now be laid to rest for a town, state honestly, that hasn't been able to sleep comfortably for 5 days now. My heart is heavy for those whose lost loved ones, and for all those who have been injured by these senseless acts.  I am still more than slightly shocked that this happened in the US again.  I hope that EVERY family has closure, the victims, and the suspects.  Everyone deserves closure in this regard.

But, for craft today, I attempted the glitter jar idea.  I found it online through a friend on facebook.  It is a jar that you fill with water, food color, glitter and glitter glue.  The person that created this glitter jar had this beautiful light pink water with purple/pink glitter sunk to the bottom.  Well, my kids got to them and they are clumps of glitter at the bottom and Iris' is dark red and Penny's is dark dark dark blue.... as are my hands.  I look like a smurf.  Thanks to Penny dropping the blue food coloring INTO the glitter before I added water.  I had to fish the food color out and it was a nightmare.  I hope that I don't look like a smurf for the rest of the weekend :-p

It is way past bedtime, the Watertown thing has had me hooked all night and unable to focus on this.  I will leave you with the recipe to make this.

a small container with lid (WATER TIGHT!)
a few tubes of glitter (SMALL tubes of glitter)
1 tube of glitter glue (i think i would do a larger tube)
warm water
1-2 drops of food coloring

add everything to the jar, cap it, and shake.  It does turn into a very pretty glitter jar, just ours are MUCH too dark, and Penny's leaks like a breached levy!  I will need to switch bottles for her sooner rather than later!

Thursday, April 18, 2013

Day 108: Sidewalk Paint

1 part corn starch
1 part water
food coloring (neon works really really well!)

Easy, I love easy crafts.  I especially love crafts that the "mess" is outside!  We mixed this inside, the girls mixed the food coloring into the muffin pan and we headed outside with a plethora of paint brushes (and our homemade chalk).

It was a little infuriating to color with chalk paint.  It takes a really long time, but when it dries, it looks AMAZING.  I am wondering if it will ever come off our driveway though.  I am thinking it may take an act of nature to dump enough rain on our driveway to clean it.  It looks like someone painted our driveway.  In the future, I will make these in small cups with lids so that we can save them and not wash it down the drain when we're done.  They are pretty, and I wish that my kids had more patience, because I could have sat and colored the entire driveway with them!


I was really happy with how well our homemade chalk colored as well.  I took a picture of the different yellows side by side.  The one that we did with actual acrylic paint was much darker, and I feel, colored nicer.  However, it would have been totally unreasonable to do ALL of our chalks with acrylic because it had to be SO wet, and it did dry funky too.  But, it has a really nice look to it.

BTW, with the chalk paint, you can use sponge brushes, i think that it may go on easier, but the sidewalk rips the sponges to pieces, so have a lot on hand.

Wednesday, April 17, 2013

Day 107: Modeling Foam

You know, there are crafts that we have done that I really thought that they would be awesome crafts for the kids and they end up totally uninterested.  Today, I grabbed a few bags of Model Magic out of the craft drawer.  I have absolutely no idea where this stuff came from, it showed up in a drawer at the beginning of the year, and I never remember buying it.  I honestly had NO expectations of this being a successful craft, but I must admit, I was pleasantly surprised!

I really didn't know what to expect from Model Magic either, I halfway expected it to crumble, be a mess, be dry, etc etc etc.  It wasn't very much when I opened the packages, VERY small packages, and weighed next to nothing.  I very apprehensively split each of the 4 bags into 3 pieces and gave each of us a piece.  Once we started working and playing with everything, I was very surprised to find just how far each little piece of this stuff went!

The girls rolled it out into patties, they rolled it into snakes, the smashed it together, cut out snow men and stars, they smashed it with different things to see how it squished.  Penny figured out how to make it look like poop... the things that come out of her mouth at times cracks me up!

At the very end- the girls smashed all their pieces on top of each other and stuck a "flag" in it :-p

And I made beads (given that they dry?) for a future craft...


Tuesday, April 16, 2013

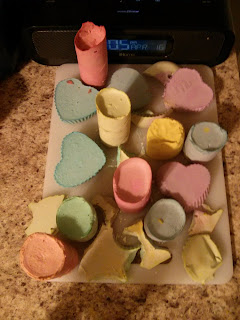
Day 106: Chalk

It was a dark and dreary day today and I knew there was no hope in getting the girls outside to play, so I decided that today would be an exceptionally nice day to make sidewalk chalk.  I had a few reservations, mainly that I didn't have powdered tempura paint, but I found a blog that said you could use acrylic paint (more on that later) or food coloring.  So, I finally decided to bite the bullet and sit down with the girls to make chalk.

There is prep work and forethought that must go into this.  You need silicon molds (silicon cupcake holders work well) or toilet paper/paper towel tubes.  If you use cardboard tubes, you have to seal the bottom so that chalk doesn't leak out while it is still runny.  Well, I was being lazy the first time and didn't want to go find the duct tape, so I grabbed packaging tape from beside me and sealed the bottoms.  BIG mistake, it POURED out of the the packaging tape like a breached levy!  So, i stopped immediately, and replaced all the tape with duct tape.. until I ran out of duct tape, and covered the remaining tubes with large pieces of masking tape.  Lesson learned: (which surprised me honestly) masking tape is the way to go!

First and foremost- not for the faint of heart.  Chalk making is MESSY.  There was plaster of paris everywhere in the dining room!  It is just a powder, so as you're pouring it, dust is flying everywhere, ugh, what a mess.  But, I mixed it: 1 cup PoP and 3/4 cup water, and then split it between the girls in small Glad plastic bowls.  I gave them each a wooden Popsicle stick to let them mix their colors with.  We started with using acrylic paint for the dye, but there are 2 problems with that.  First, if it isn't super runny, it just clumps up in the PoP mixture and doesn't actually dye anything.. Second, you have to use a LOT of even the runny kind to dye the PoP, and it turned gloopy really fast and is taking a much longer time than the others to dry.  I will say this though, it is the prettiest, brightest chalk we have!  We used food coloring for the rest, and they turned out really nice, especially the Neon colors.

The blog I got the recipe out of said that hers took THREE days to dry enough to use, so I thought "ok, it is going to take about 3 days before it is nice enough to go out and play with the weather predictions right now."  Well, as you can CLEARLY see, it did not take three days to dry, it didn't even take three hours.  I think they were ready to come out of the molds within an hour.  Then, i let them dry a few more hours and rubbed the remnants of the cardboard tubes off the things of chalk.  Now I am just waiting to have a nice day to take the girls out to use their chalks.

Thankfully, clean up was not difficult with this and most everything ended up being trash.... which could be a problem since our trash men are on strike :/

Monday, April 15, 2013

Day 105: Chalk play

Today, I decided that because it was such a nice day, I wanted to get the kids outside for some play.  I thought that doing a project craft might be fun.  I have found a lot of recipes to make different kids of chalk and i've been planning on making chalk for awhile now.  With that, I thought that it would be kind of fun to give the kids (and us) a baseline as to what store bought chalk looks like.  So, this evening, I set the kids loose with the chalk bucket and here are their creations.  It will be interesting to see the difference in the next few days/weeks that we make our own types of chalk.


On a personal note, my heart goes out to Boston.  I live in an idealistic lala lands where I like to believe that these senseless acts of extreme violence are behind us, but it seems that every time I turn on the TV or the computer there is something else smacking us in the face that senseless violence is very much so a part of the world we live in.  While I know that there are many injured, and a few who have died from this, I feel that this could have been so so much worse.

Sunday, April 14, 2013

Day 104: Birthday "Bonies"

Well, first and foremost, Happy 29th Birthday to my amazing husband!  We had an amazingly relaxing, laid back, fun day.  The first shower that took place in the house today was after 1 this afternoon.  We played outside some, the girls got to go to the park with Mike while I made dinner.  Now we are settling down for the night to play Xbox before bed :)

For Mike's birthday, the kids wanted to make him a cake, but at the last minute we decided to make him brownies.  We bought these amazing Ghiradeli (sp?) double fudge brownies with this amazing icing.  Iris asked if we could make those for craft today, so I was fine with that.  I have decided that "craft" in my mind is anything getting the kids doing something new/different and engaging them in something that is outside of their norm, and baking is something that I am always happy to embrace as the kids are interested.  

I love baking with boxed mixes with the girls.  Mainly because it is typically 3-4 ingredients, including the mix, it doesn't matter which way the are added, and I can easily pre-measure everything before we get started.  In today's case, i was able to let Penny add the mix and the egg and Iris got to add the messier stuff, water and oil, to the bowl.  They were each able to get a turn mixing, and were able to help me pour the batter, and possibly most importantly to them, lick the spoon in the end :)

Once the brownies came out of the oven, Penny was able to help me pour the icing on them, and Iris helped spread it out.  Then, they got to "decorate"  I guess they don't understand dispersing the toppings, because I gave them each 5 cups of "toppings" and they just took turns dumping all of the toppings into one spot on the brownies.  By the time they were done, we had a huge pile of sprinkles in the center of the brownies and and I had to spread out a bit before we could eat them.

But, they were so excited to make the brownies and Penny was absolutely ecstatic about getting to eat the "bonies"  She wanted them for dinner too :-p


Saturday, April 13, 2013

Day 103: Homemade bubbles

So, this really isn't a "craft" but it is an engaging activity that both girls got a chance to do their own.  I really wanted to make sidewalk chalk, and i thought i had all the necessary "ingredients" but when it came time to make it, I realized that my recipe was for sidewalk paint, not chalk.  And since it was 43* and cloudy/rainy all day today, i didn't think that sidewalk paint would be fair to anyone.  So, I changed it at the last minute and we made our own bubbles.

It is a very easy process, 1/2 cup dawn, 2 cups water, 2 tsp sugar.  Now, i can't figure out what the sugar does, and I am wondering if i could have replaced it with corn starch to make the bubbles a little "stronger" like the Gymboree bubbles.  But, we did sugar in ours, and they worked well.  All you do is mix everything up, whisk it, and blow bubbles!

the kids had a BLAST.  We gave them straws to dip into the bubbles and blow bubbles with, they just stuck it into the mix and blew the biggest bubbles ever.  Our table was a soapy mess!  However, i think it is cleaner now than it has ever been :)

Mike took a few pictures, but he hasn't sent them to me, and I don't have the heart to ask him right now because he is fighting with his airplane.

Friday, April 12, 2013

Day 102: Finger Painting

Can you believe we are over 100 days into this craft thing, and I just now got brave enough to finger paint with the girls.  I mean, it is MESSY... and Penny..... and paint... and well, if you've read this blog in that past, that is enough said :-p  But today, apparently I was bitten by the Finger Paint Paper bug or something, and I broke down and bought finger paints!  I only bought 4 colors, but hey, that got us started.

So, we started with giving each of the girls 1 piece of paper, and 1 squirt of paint at a time.  At first it was kind of funny.  I squeezed the paint onto the paper and said "go ahead" and they both looked at me like I was crazy.  I could actually see the wheels turning in Penny's head: "do I dare touch this with my hands?!?!?" hehe.  But, once they got started, they both had a lot of fun, though they did insist on wiping their hands off each time we finished painting with a color.


The second paper we did was actually collaborative with the girls.  I set them across from each other, and we talked about colors.  I explained to them what primary colors were, and then I explained that when we mix primary colors, we get new colors.  So, we mixed red and blue first, and they were both so excited to see it turn purple.  Then we mixed yellow and red, then blue and yellow.  Then, they decided they wanted to paint the ENTIRE paper.  So this is what we ended up with... with no fighting!


Thursday, April 11, 2013

Day 101: Poured Paint Pots

I was trying to figure out something to do with the 100th craft yesterday, and stumbled upon a blog that described this drip paint technique.  I thought it would be kind of cool and something the girls would be able to do.

The basic premise of this idea is to flip a clay pot upside down, cover the drainage hole with tape and literally pour paint on the top.  Just enough so that it starts to pour down the sides.  Then you just take the next color and pour it on top.  We tried to be sparing with the paint, but Iris' motto was apparently the more the merrier.... you can currently see 2.5 of the six layers of paint she poured on her pot because she went so heavy.
Penny really took to this craft technique though. I think that it was a good balance of paint bottles and her personal strength.  She can only squeeze so hard for so long, and it seemed like that amount of time was the perfect amount of paint to make it pour and drip over the sides properly.


We only had 2 clay pots, so I had no intentions of actually doing this craft, but then I thought that the kids may need an example, so I grabbed a Solo cup and showed this kids.  Solo cups don't have any porous surface to keep the paint on them, so the paint has, over the course of the evening, dripped down and is mainly pooled on the paper plate below it :-p

Wednesday, April 10, 2013

Day 100!!! 'Nough Said

There is part of me that just wants to post the picture of this and not even write anything, but this is Day 100!!! 100 crafts in 100 days!!!!  We are ALMOST 1/3 of the way through the year and we are still going strong!

It is hard to find crafts with the "100" theme.  I finally searched "100th day of school" on Pinterest, and I hit a jack pot!  I decided to do this 1-0-0 paper plate theme.  I used hot glue to stick the #s together, then i put dabs of glue everywhere to keep the pasta stuck to the plates.

If you are wondering- to keep with the 100 theme, each girl got 100 pieces of dyed pasta for their plates, and they used them all! Now if you sit here and count, I can't promise you that there are 100 pieces of pasta on each plate, because come on, we are talking about a 2 and 4 year old.  Who knows where they put the pasta.. I mean, Penny tried to eat a piece today! lol

On a side note: My hits to this blog have SKYROCKETED lately. I've gone from about 8-10 a day to almost 30 a day.  My +1s have gone from 1 or 2 to 3 or 4, and I can see I'm getting a lot of hits from overseas.  I'd love to know who everyone is if you are a regular.  I don't like feeling like i'm talking to myself all this time :)  Feel free to leave a note, let me know who you are and where you live, and most importantly, if you have any craft ideas, make sure to let me know!


Tuesday, April 9, 2013

Day 99: Garden Start-Up

Today's blog will be quick.  We didn't necessarily do a "Craft" today, but more of a learning activity to follow us through the next few weeks/months, if it succeeds :-p  We planted seeds in little cups outside.  While we were at Home Depot on Saturday, I let the girls pick out seed packets of things they want to grow over the spring/summer.  I was hoping that they would choose things like a pack of tomatoes, maybe a pepper plant, some herbs, maybe even some peas or green beans.  Basically, I wanted things that we could easily plant in a planter and not in a huge garden.  Well, leave it to Iris and Penny, they chose lettuce, broccoli, yellow squash, and corn... yes, corn.  We are attempting to grow corn, in a POT on the back porch.. yup this a recipe for disaster.

The girls got to dig shovels full of dirt from a bag and put the dirt in their cups, then they got to put seeds in each cup.  We planted a lot of lettuce, i hope that the lettuce takes off.  But other than that... who knows how this is experiment will turn out, it could be a total disaster, hopefully it will be worth our time in a few months.  Wish us luck! :-p 

Monday, April 8, 2013

Day 98: Flower cutouts

So, a few months ago, I saw this really cute paper punch craft done with paint samples from a hardware store.  I had been thinking about it and thinking about it, and thought it would be a super easy, fun craft to do with the girls.  On Friday, we went to Jo-Ann's and picked out a paper punch (daisy) that they liked, and then on Saturday, after making our bird houses, we went to the paint department and they picked out paint swatches that they liked.

That is where it went south.  I didn't quite know where to go with this craft.  The picture I had seen, they had used a brown paper back as a gift bag for someone, well I had no need for a paper bag, and I had no real direction to go.  Mike suggested just gluing them onto a piece of green construction paper, but we had a lot of green paint swatches, so I went with black.

I really wanted to make something as well, but I spent the entire time punching daisies out so that Iris could hoard them only to pile them all up on her paper at the last possible second and declare craft "done".  Penny did actually enjoy gluing her pieces on the construction paper.  I got a P glued on before the kids lost total interest and craft was effectively OVER.