Showing posts with label crayons. Show all posts

Sunday, April 28, 2013

Days 117/118

Well, I slacked again, but only because I was out of town for Penny's birthday and didn't bring my laptop with me.  However, thanks to a savvy aunt, we didn't miss craft yesterday!

Day 117:
My aunt works for a pediatrician's office and is in charge of ordering the stickers.  The girls really luck out in this department, because she has a wealth of stickers for them every time we visit!  However, yesterday, she came up with the idea of giving the kids these "build it yourself" stickers.  They are a really cool idea that I had never seen until a few months ago, at her office, and they come in tons of different themes with one main focal point, and then a bunch of little extra pieces to add to the pictures.  Some that she had at her house were birthday cupcakes, shopping carts, princess carriages, cranes, people, teddy bears, fish tanks, and I am sure quite a few more even.  She even had a great idea to put them on wax paper so the kids could move them around as they saw fit... I will need to remember that trick for the next stickering session we have at our house!


Day 118:
Well, I came *this* close to forgetting completely about craft today!  You would think after 118 days, it would be totally ingrained in my head, but it is not apparently :/  So, we stopped at a BP station to fill up on the way back home and I ran in with the express purpose of trying to find something in a convenient store to do craft with.  I had crayons in the car, so i was hopping beyond hope that they would have paper plates... they didn't.  They had styrofoam and plastic, no paper :(  But, they had white, circular coffee filters.  I figured that these would make very cute flowers if colored nicely, so I grabbed them and headed back to the van.
I handed both girls back coffee filters, gathered up as many crayons as i could find that had been strewn through he van, and cut them loose.  After almost 2 hours, this is what we ended up with... 1 usable, very pretty, flower! lol

P.S.- here are the finished Doc McStuffin's Big Books of Boo-Boos


Sunday, April 21, 2013

Day 111: Nature Rubbings

I remember in 3rd grade, we did a local history unit and went to the Old Worthington Cemetery and did gravestone rubbings with crayons.  It was a little creepy to me, even at 9 years old, that we were making impressions of tombstones in crayons.... but, it was a fun activity.  A few days ago, when we were outside coloring the driveway, I thought about how fun it would be to go outside and make rubbings of different objects with crayons.  Well, today, I thought it was warmer than it really was and the kids really wanted to go out, so I threw so coats on us and we went outside with paper and crayons.

First, it was sunny, and the wind was calm, so we started at the driveway and used our crayons to make an impression on the paper, then we went to the neighbors fence (hope she doesn't mind that it is a little browner now than before we started this project :-p), then went to the brick below our porch, then the house, then the neighbors tree since it is the only tree around us now!

Iris really got into it, she had a lot of fun and got the point.  I wanted to use some stepping stones, and kind of a take a walk and find more things to make impressions with, but Penny started to complain that she was cold, the wind was ripping, and Coraline's feet were just about frozen, and I was cold.... so, we came inside.  Here is what we ended up with:

Friday, March 29, 2013

Day 88: Egg Dying SUCCESS!

So, after the major flop last night, I decided to give us a pretty sure fire success, and I bought WHITE eggs. I never buy white eggs any more, and because for some reason, only brown eggs are organic/free range/hand gathered/cage free/pasture raised, etc.  But, i sucked it up and bought a carton of white eggs today and I am SO glad I did!

We decided to make Kool-Aid eggs tonight, and they are GORGEOUS!  They are the prettiest, brightest eggs i have ever made!  We used lemonade, Cherry, Strawberry, Grape, Blue something or other, Lime and Orange Kool-Aide. So easy, so quick, and so fun!

We plowed through the first dozen eggs, so i grabbed the brown eggs, and we tried those, even they turned out pretty!

I loved the brown eggs because they looked so earthy, they almost had a wooden appearance to them.  They are absolutely beautiful!  Can you pick out the brown vs white eggs?


Also, the heart egg was Cs first ever easter egg, Mike held her and let her hold the egg (uncooked, btw!) and color on it a little with the white crayon, then he drew a heart on it and let C put it in the water.  omg, stressful!  But she did great, and she has a beautiful first easter egg :)

I guess here are the required things:

Solo cups
Kool-Aide
1 cup of warm water/color of Kool-Aide

Dissolve the powder in the water then dunk the eggs in.  the longer they sit, the darker they get.  That easy, and let me tell you what, the house smelled amazing!  Like a fruit salad exploded in our dinning room/kitchen :)

Tuesday, January 22, 2013

Day 22- Birthday t-shirts

I woke up this morning hell bent on making party hats with the girls.  I didn't know if it was going to take the form of princess crowns, or big cone shaped party hats with ribbon coming out of the top.  But I was convinced I was making party hats for them.  Then, I came across this board on Pinterest and my entire YEAR changed course.  I think I was looking for something for my dad and stumbled upon, http://pinterest.com/joycelibal/kid-crafts/ and OMG the IDEAS!!!!  Well, one of the ideas was to use SANDPAPER and crayons to make Iron on transfers.  How fricking cute?????
So, I ask Mike if we have any sandpaper I could "destroy" and head downstairs to get sandpaper and my iron, which I had packed away MONTHS ago in hopes that we would be in a new house by now, and 2 white play shirts the girls have.  I grab the crayons and we set to work.

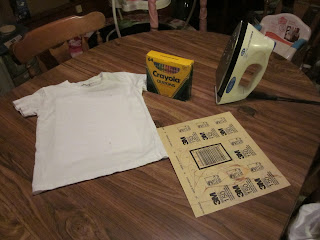
Supply list- easiest one yet, i think!

 White t-shirt(s)
Sandpaper- fine-ish grit.  I used 150... any thicker and it EATS your crayons
Crayons
Iron
I put a piece of white paper between the layers of the shirt, just in case something were to bleed, or stick, or something, I don't know if it is possible, but since these are once and done things, I decided to use an abundance of caution.

I took a little sandpaper and wrote "I'm 4" on it and made a cake and balloons to go on the back of Iris' shirt.  Word to the wise, remember that you have to write BACKWARD on the sandpaper if you want it to come out right on the shirt :-p  I didn't write backward on my "test" cloth, and now I have  a cheese cloth that says "sgitsuL ehT"  Oh well, at least it was on a cheese cloth and not Iris' shirt!


Penny wasn't really feeling it too much, she wanted to color on the back of the sandpaper, which probably didn't make my iron too happy tonight.  So I colored most of her sandpaper, and to be honest, I was REALLY happy with the way it turned out!  But, Iris did well with hers, and she colored quite a bit before finally becoming board, so I wrote "Birthday Girl" (not so easy when you are trying to mirror image every letter!) and ironed it on to her shirt.

Once everything is colored, and the more color the better, don't be afraid to press hard, flip the sand paper over and iron!  I set my iron to medium, and it only takes a few seconds for the image to transfer.  The shirts look SOOO much better than the ink jet iron-on templates you get at the craft stores, and these are so much more personalized.
I honestly cannot WAIT until Saturday at the Children's Museum to see the girls wear these.  Now my real question is, how well will they wash??? I guess we will find that out sometime next week!